Settings | Camera settings
Camera & Scene Settings
Camera and scene settings control how products are visualized, how users interact with them, and how advanced rendering effects (lighting, shadows, reflections, occlusion) are applied.
Shadow Camera Settings
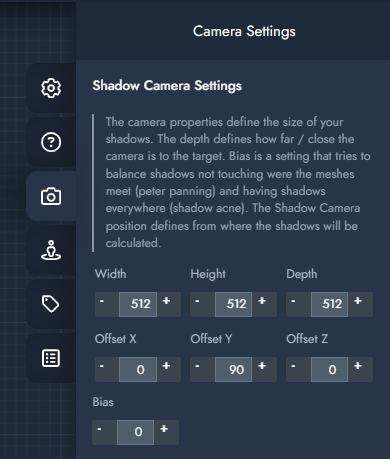
Shadow Camera Settings
Setting | Description |
|---|---|
Width / Height / Depth | Defines the volume within which shadows are rendered. Larger values increase coverage but reduce precision. |
Offset X / Y / Z | Offsets the shadow camera position relative to the scene origin. Useful for fine-tuning shadow alignment. |
Bias | Prevents common shadow artifacts such as shadow acne (self-shadowing) and peter-panning (detached shadows). The optimal value depends on scene scale and shadow camera size. |
Camera Settings
Rendering
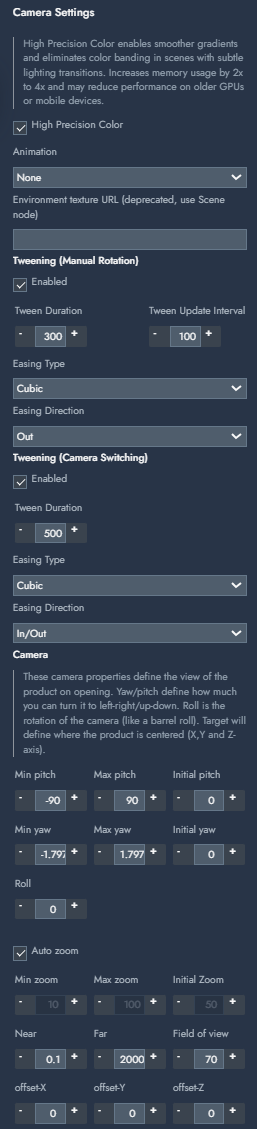
High Precision Color
Enables higher-precision color buffers to reduce banding and improve smooth gradients in scenes with subtle lighting transitions.
Impact
Increases memory usage by approximately 2× to 4×
May reduce performance on older GPUs or mobile devices
Animation
Animation
Defines whether camera animation presets are applied.
None: No predefined animation is applied.
Swing: A swing animation is applied upon loading.
Turntable: A turntable animation is applied upon loading.
Environment
Environment Texture URL (Deprecated)
This field is deprecated.
Environment textures should now be configured via the Scene node instead.
Camera Tweening
Tweening controls how smoothly the camera moves between states.
Tweening (Manual Rotation)
Controls camera motion when the user manually rotates the product.
Setting | Description |
|---|---|
Enabled | Enables smooth interpolation during manual rotation. |
Tween Duration | Duration of the rotation animation in milliseconds. |
Tween Update Interval | Update frequency of the tween animation in milliseconds. |
Easing Type | Interpolation curve (e.g. Cubic). |
Easing Direction | Direction of easing (e.g. Out). |
Tweening (Camera Switching)
Controls transitions when switching between camera states or views.
Setting | Description |
|---|---|
Enabled | Enables smooth camera switching animations. |
Tween Duration | Duration of the camera switch animation in milliseconds. |
Easing Type | Interpolation curve (e.g. Cubic). |
Easing Direction | Easing behavior (e.g. In/Out). |
Camera
These settings define the camera limits and the initial view when the configurator loads. This will be overwritten by the camera node if used.
Rotation Limits
Setting | Description |
|---|---|
Min Pitch / Max Pitch | Vertical rotation limits (up/down). |
Initial Pitch | Camera pitch on initial load. Must be within min/max range. |
Min Yaw / Max Yaw | Horizontal rotation limits (left/right). |
Initial Yaw | Camera yaw on initial load. Must be within min/max range. |
Roll | Rotation of the camera around its viewing axis (barrel roll). |
Zoom
Setting | Description |
|---|---|
Auto Zoom | Automatically adjusts zoom to fit the product within its bounding box. |
Min Zoom / Max Zoom | Defines allowed zoom range. |
Initial Zoom | Zoom level when the scene is first loaded. |
When Auto Zoom is enabled, the camera dynamically adapts to the product scale.
Clipping & Lens
Setting | Description |
|---|---|
Near | Near clipping plane. Lower values allow closer zoom without clipping geometry. |
Far | Far clipping plane. Higher values support larger scenes. |
Field of View | Camera lens angle. Higher values give a wider view; lower values appear more zoomed in. |
Camera Target Offset
Setting | Description |
|---|---|
Offset X / Y / Z | Shifts the camera’s focus point away from the default origin (0,0,0). Useful for asymmetrical products. |
Tone mapping
Tone-mapping
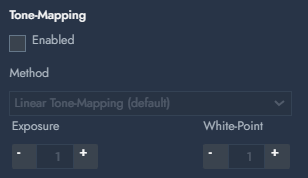
Tone Mapping
Tone mapping converts high dynamic range (HDR) lighting into a format suitable for standard displays.
Settings
Setting | Description |
|---|---|
Method | Linear (default) |
Exposure | Overall brightness multiplier. Default: 1 |
White Point | Reference white value. Default: 1 |
Bloom
Bloom
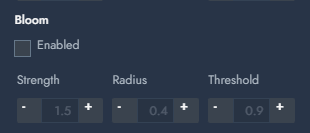
Bloom
Bloom enhances bright areas by simulating light bleed beyond object edges.
Setting | Description |
|---|---|
Strength | Intensity of the bloom effect. |
Radius | Distance over which light feathers outward. |
Threshold | Brightness threshold at which bloom starts to appear. |
Ambient Occlusion
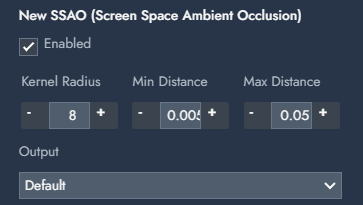
New SSAO (Screen Space Ambient Occlusion)
A performant, modern SSAO implementation that replaces the legacy SSAO solution.
New SSAO
Setting | Description |
|---|---|
Kernel Radius | Radius of the occlusion sampling area. |
Min Distance | Minimum depth difference for occlusion detection. Smaller values increase detail but may add noise. |
Max Distance | Maximum depth difference for occlusion detection. Larger values increase reach but may cause unrealistic occlusion. |
Output | Debug view (Default, SSAO only, Blur, Depth, Normal). |
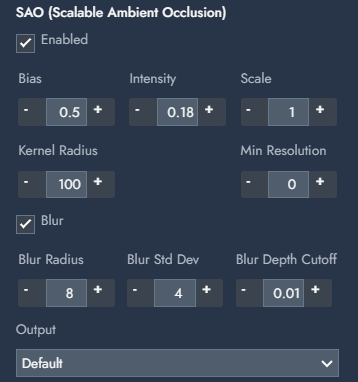
SAO (Scalable Ambient Occlusion)
An alternative AO method optimized via mipmapped depth textures.
SAO
Setting | Description |
|---|---|
Bias | Reduces AO artifacts caused by depth precision limits. |
Intensity | Overall strength of the occlusion effect. |
Scale | Controls AO range and size. |
Kernel Radius | Smoothness of the AO effect. |
Min Resolution | Minimum resolution threshold for AO calculations. |
Blur (Optional)
Setting | Description |
|---|---|
Blur Radius | Blur spread radius. |
Blur Std Dev | Blur standard deviation. |
Blur Depth Cutoff | Depth threshold beyond which blur is not applied. |
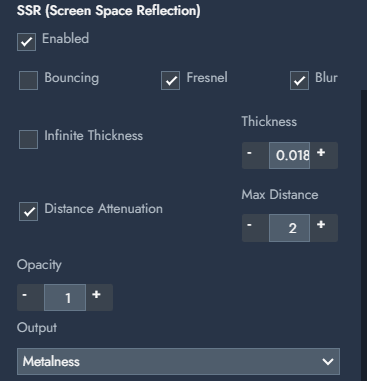
SSR (Screen Space Reflection)
Screen Space Reflection (SSR) simulates reflections of visible objects in the scene rather than only reflecting light sources. It reflects screen-space data back into the camera view. This approach is performant but cannot reflect off-screen or occluded geometry.
SSR
Setting | Description |
|---|---|
Enabled | Enables or disables Screen Space Reflections for the scene. |
Bouncing | Enables multi-bounce reflection simulation. Increases realism but has a higher performance cost. |
Fresnel | Applies Fresnel-based blending so reflections become stronger at grazing angles and weaker when viewed head-on. Improves physical realism. |
Blur | Applies a blur to the reflection buffer, softening reflections and reducing visual artifacts. |
Infinite Thickness | Applies a large fixed thickness to all pixels. Improves reflection stability but may introduce linear distortions. |
Thickness | Controls the intersection tolerance used when calculating reflections. Higher values improve robustness but reduce accuracy. |
Distance Attenuation | Enables fading of reflections based on distance from their source. |
Max Distance | Maximum distance over which reflections are evaluated. Reflections fade out beyond this value. |
Opacity | Controls the transparency and overall visual strength of the SSR effect. |
Output | Defines what is rendered to the viewport (Default, SSR, Beauty, Depth, Normal, Metalness). Mainly used for debugging and analysis. |
Anti-aliasing
Anti-aliasing techniques reduce jagged edges and sampling artifacts in real-time rendering. Multiple methods can be enabled depending on quality and performance requirements.
Anti-aliasing (SMAA – Subpixel Morphological)

Anti-aliasing (SMAA)
Setting | Description |
|---|---|
Enabled | Enables Subpixel Morphological Anti-Aliasing. SMAA detects and smooths edges in screen space, offering a good balance between visual quality and performance. |
Notes
Low performance cost
Preserves sharpness better than FXAA
Suitable for most desktop and mobile devices
Anti-aliasing (FXAA – Fast Approximate)

Anti-aliasing (FXAA)
Setting | Description |
|---|---|
Enabled | Enables Fast Approximate Anti-Aliasing. FXAA smooths edges using a fast post-processing pass. |
Notes
Very low performance impact
Can slightly soften fine details
Often used as a fallback or combined with other AA methods
Anti-aliasing (Supersampling)

Anti-aliasing (Supersampling)
Setting | Description |
|---|---|
Supersampling Factor | Renders the scene at a higher resolution and downsamples it to the canvas size. Higher values improve image quality but significantly increase GPU load. |
Notes
Highest visual quality
Expensive in terms of performance
Fractional values (e.g. 1.2) are supported
Anti-aliasing (Multisampling – MSAA)

Anti-aliasing (Multisampling)
Setting | Description |
|---|---|
Samples | Number of samples per pixel used during rasterization. Typical values are 2, 4, or 8. A value of 0 disables MSAA. |
Notes
Improves edge quality without heavy post-processing
Performance cost increases with higher sample counts
Effectiveness depends on GPU and platform support
Canvas Rendering
Setting | Description |
|---|---|
Disable Canvas Blur | Prevents the browser from applying blur when the canvas is scaled or resized, preserving pixel sharpness. |
UI controls
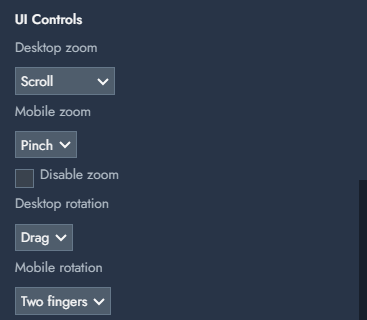
UI controls
Setting | Description |
|---|---|
Desktop/Mobile zoom | Desktop users can zoom in two ways: using the mouse scroll wheel or by pressing Ctrl in combination with the mouse scroll wheel. On mobile devices, the zoom functionality is exclusively available through a pinch gesture. |
Disable zoom | Activates or deactivates the zoom function. |
Desktop/Mobile rotation | On desktop, rotation is achieved by holding the left mouse button and moving the mouse. For mobile devices, rotation can be set to either a one-finger or two-finger gesture for manipulating the visualization. |
Tools
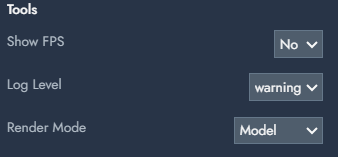
Tools
Setting | Description |
|---|---|
Show FPS | Displays performance metrics (FPS, MS, MB). |
Log Level | Logging verbosity (default: warning). |
Render Mode | Switch between Model and Scene rendering. |
Scene (deprecated)
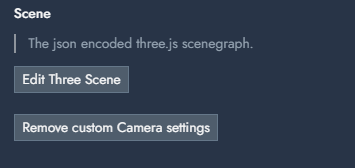
Scene
Setting | Description |
|---|---|
Edit Three Scene/Remove Three Scene | You have the option to configure your 3D scene, including aspects like light sources and shadows, using the three.js editor. (https://threejs.org/editor/) Once you have configured the scene in three.js, export the scene. The resulting Json data can then be imported into the graph editor by selecting the 'Edit Three Scene' option." It is recommended to exclude 3D geometries from the Json data and focus solely on light sources and shadow configurations. |
Remove custom Camera settings | This action resets all custom settings, reverting the camera and scene back to their default configurations. |